
Groin strain rehab: a phased exercise plan with return criteria
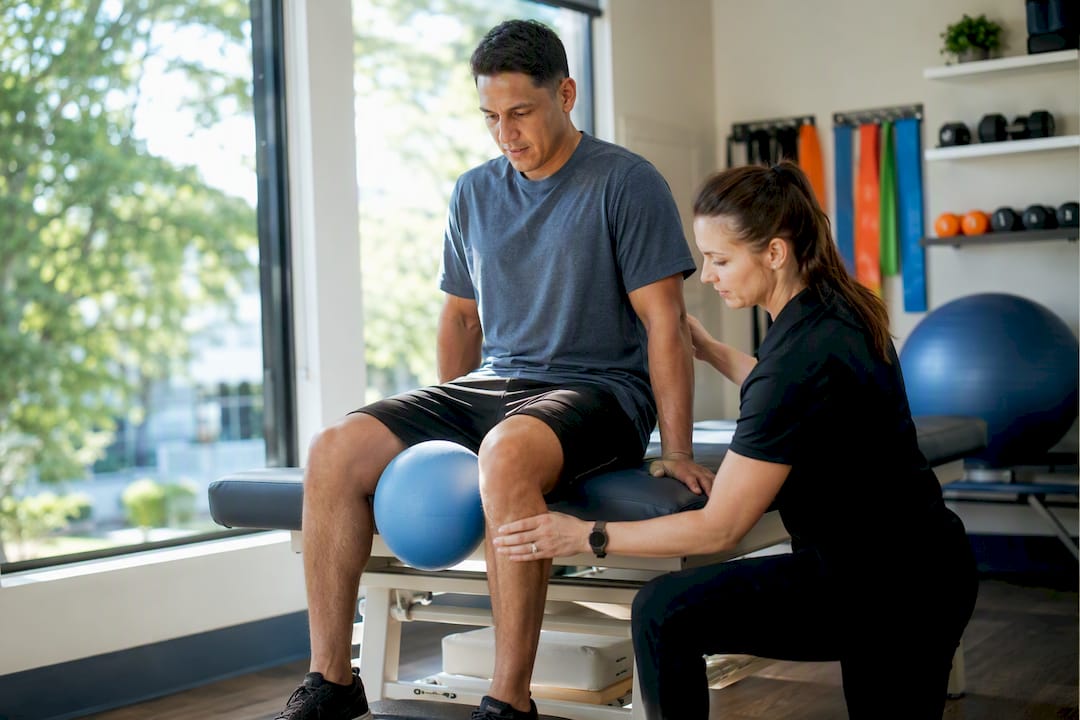
A phased, criteria-based rehabilitation programme, moving from isometrics through progressive strengthening into eccentrics and functional drills, gives most people with a groin strain the fastest and safest route back to normal activity. This is not a timeline you follow blindly; it is a series of stages you clear based on how your body actually responds.
In the first 48 to 72 hours, focus on these steps:
Rest from aggravating movements, particularly sprinting, kicking and rapid direction changes.
Apply ice for 10 to 20 minutes every three to four hours, always wrapped to protect the skin.
Use compression and keep the leg supported when resting.
Keep walking within pain-free limits rather than avoiding movement altogether.
Use short-course NSAIDs only under guidance rather than routinely self-medicating.
Stop any activity that sharply increases pain rather than pushing through it.
As a rough guide: grade 1 strains often settle within a few weeks, grade 2 within a few months, and grade 3 can take several months or longer, particularly where surgery is involved.
Key Takeaways
Effective groin strain rehab depends on phased, criteria-based exercise progression rather than fixed timelines, with objective strength and pain-free testing determining when to advance.
Point | Details |
Follow phases, not the calendar | Progress from isometrics to strengthening to functional drills only once you pass pain-free strength tests. |
Match grade to expectation | Grade 1 often heals in 2 to 4 weeks, grade 2 in 2 to 3 months, grade 3 in 4 months or more. |
Treat the acute phase properly | Ice 10 to 20 minutes every 3 to 4 hours, protected movement, and short-course NSAIDs only if needed. |
Train both legs | Bilateral strength and core control reduce the roughly 20% recurrence risk seen after early return. |
Get a professional assessment | Parkstherapycentre offers strength testing, manual therapy, and individualised rehab plans across Bedfordshire and Buckinghamshire clinics. |
Where the evidence and rehab guidance in this article comes from
For readers or clinicians wanting to dig further, a few sources anchor this guide directly:
The NCBI Bookshelf’s adductor strain overview covers grading, recurrence statistics, and prevention evidence in detail.
NHS guidance on sprains and strains offers accessible acute-care advice and signs warranting review.
The Sports Injury Clinic’s groin rehabilitation programme sets out a practical phase structure worth discussing with a clinician.
For broader rehabilitation progression principles, the orthopaedic perspective in this sports injury rehabilitation guide is a useful complementary read.
Use these alongside a hands-on assessment rather than as a substitute for one; individual factors always shape the right plan.
This article is general information, not a substitute for advice from a qualified doctor. Consult a qualified healthcare professional about your own circumstances before acting on anything here.
Table of Contents
What is groin strain rehab and why does it need a phased approach?
Which muscles and structures are involved in a groin strain?
What causes a groin strain and how does the type change treatment?
What should you do in the first 48 hours after a groin strain?
What does a phased groin strain exercise programme look like?
How does a physiotherapy clinic assess and treat a groin strain?
What is groin strain rehab and why does it need a phased approach?
Groin strain rehab is the structured process of restoring strength, flexibility and function to the adductor muscles after a tear or overstretch, using progressive exercise rather than rest alone. Adductor strain physiotherapy works because it respects how muscle tissue heals: too little load delays repair, too much load re-tears healing fibres.
The reason a calendar-based approach fails so often comes down to variability. Two people with identical grade 2 strains can have completely different recovery speeds depending on age, training history, and how well they follow load-management rules. That is why a phased, criteria-based structure, where you move to the next stage only once you meet specific strength and pain thresholds, consistently outperforms simply waiting out a fixed number of weeks. The rest of this guide walks through that structure from anatomy through to return-to-sport testing.
Which muscles and structures are involved in a groin strain?
The adductor group sits on the inner thigh and pulls the leg toward the midline, stabilising the pelvis every time you plant a foot to change direction. Four muscles do most of the work:
Adductor longus is the most commonly strained adductor, particularly during kicking and sprinting.
Adductor brevis lies deeper and assists with hip flexion alongside adduction.
Adductor magnus is the largest of the group and contributes to both adduction and hip extension.
Gracilis crosses the hip and knee, linking pelvic stability to knee control.
Groin pain is not always adductor strain, though. The iliopsoas (hip flexor), pubic symphysis, and hip joint itself can all refer pain into the same region, and mistaking one for another leads to the wrong rehab exercises entirely. Iliopsoas-related pain tends to worsen with resisted hip flexion rather than adduction, pubic-related pain often centres directly over the pubic bone, and hip joint pathology usually restricts internal rotation. A simple anatomical diagram marking these structures alongside the adductors is worth having on hand when you are trying to work out what actually hurts. Roughly 42% of people with muscle-tendon groin injuries report limitations persisting beyond 20 weeks, which underlines why an accurate structural diagnosis early on matters more than most people assume, according to research summarised on the NCBI Bookshelf.
What causes a groin strain and how does the type change treatment?
Most adductor strains happen through one of three mechanisms: a sudden change of direction while sprinting, a forceful kicking action, or an eccentric overload where the muscle lengthens under load faster than it can control. Football, hockey, and martial arts see this constantly, but it also catches recreational runners off guard on uneven ground.
Not every case of groin pain is a pulled muscle, though. Groin-related injuries fall into several diagnostic categories:
Adductor strain — the classic pulled groin, graded 1 to 3 by severity.
Iliopsoas-related groin pain — hip flexor irritation, often from repetitive kicking or sprinting.
Inguinal-related groin pain — linked to the inguinal canal and sometimes overlapping with early hernia symptoms.
Pubic-related groin pain — osteitis pubis or symphysis irritation, common in footballers with high training loads.
Hip-referred pain — femoroacetabular impingement or labral pathology masquerading as a groin strain.
Grading follows a standard scale: grade 1 is a mild overstretch with minimal fibre disruption, grade 2 involves partial tearing with noticeable strength loss, and grade 3 is a complete or near-complete tear, sometimes with a palpable defect.
Pro Tip: If groin pain came on gradually over weeks rather than during a specific movement, and it’s accompanied by a burning sensation or a bulge, don’t assume it’s a simple strain. That pattern is more consistent with a hernia or osteitis pubis, and pushing through adductor-strengthening exercises in that case can make things worse rather than better.
How do you know if it’s a groin strain?
A groin strain typically produces pain on the inner thigh, near the pubic bone, that sharpens with resisted adduction, squeezing your legs together, and with movements like cutting, kicking, or sprinting. Walking is usually tolerable in grade 1 injuries but becomes noticeably limited by grade 2 or 3.
Three quick self-screen checks help clarify what you are dealing with:
The squeeze test: lie on your back with knees bent, squeeze a ball or your clinician’s fist between your knees, and note pain and effort compared to your uninjured side.
Single-leg stance: standing on the injured leg for 10 seconds should be manageable in mild strains; struggling to balance suggests a more significant injury or an alternative diagnosis.
Active hip adduction against resistance: pain here, paired with reduced strength, points toward adductor involvement rather than hip joint or hernia-related pain.
A groin strain that produces sharp pain on resisted adduction, combined with a positive squeeze test and localised tenderness over the adductor origin, is about as clear a clinical picture as musculoskeletal medicine offers.
Seek urgent assessment if you notice significant swelling or bruising within hours, a sudden loss of power that prevents weight-bearing, or any systemic signs like fever, since these can point to something more serious than a straightforward strain.
What should you do in the first 48 hours after a groin strain?
The old advice to simply rest and elevate has been refined. Current evidence favours relative rest combined with early, protected movement, rather than complete immobilisation, because some controlled loading helps guide how new tissue forms.
Practical specifics for the acute phase:
Ice: apply for 10 to 20 minutes every three to four hours, always with a cloth barrier, for the first 48 to 72 hours, based on guidance for managing acute soft-tissue injuries.
Compression: a light compression wrap or supportive shorts can reduce swelling and provide reassurance during movement.
Protected mobility: gentle walking within pain-free range is encouraged rather than avoided; total rest slows recovery more than it helps.
NSAIDs: short courses can help with pain and swelling, but they should not be used routinely or for longer than a few days without checking with a clinician, since some evidence suggests they may blunt early tissue repair if overused.
Avoid stretching aggressively, testing the injury with sprinting or kicking “to see how it feels,” or returning to sport based on pain relief alone. NHS guidance on sprains and strains recommends seeking professional review if symptoms haven’t noticeably improved within a couple of weeks, which is a useful early checkpoint even for milder strains.
How long does groin strain recovery take by grade?
Recovery time depends heavily on grade, but also on whether you are managing the injury conservatively or considering surgical repair for a severe tear. The figures below reflect typical ranges rather than guarantees, since individual healing rates vary.
Grade | Expected timeline | Common interventions | Recurrence risk |
Grade 1 | 2 to 4 weeks | Progressive exercise, activity modification | Lower, but still present without proper rehab |
Grade 2 | 2 to 3 months | Structured phased rehab, manual therapy as needed | Moderate, especially with early return |
Grade 3 | 4 months or more | Conservative rehab or surgical repair depending on severity | Highest, particularly after inadequate rehab |
Research on adductor strains puts recurrence in athletes at around 20%, and notes that conservative management of grade 3 tears averages roughly 9 weeks to return to full activity compared with around 14 weeks following surgery, though these figures vary by cohort and sport. A few things consistently shift these recovery timelines, including access to structured physiotherapy, adhering to strength and pain criteria before returning to sport, and whether the strain is chronic or recurrent.
How do you manage load and monitor pain during recovery?
Pain during rehab exercises isn’t automatically a bad sign, but it needs rules attached to it. A useful benchmark: mild discomfort up to around 3 or 4 out of 10 that settles within a few hours is generally acceptable, while sharp pain, pain that worsens the next day, or pain that lingers well past your session signals you’ve overloaded the tissue.
Activity modification during this period might look like:
Swapping running for cycling or swimming to maintain fitness without adductor loading.
Replacing lateral agility drills with straight-line walking or jogging early on.
Avoiding deep lunges or wide-stance movements until strength testing clears you for them.
Keeping a simple daily log of pain scores, activities attempted, and next-day soreness to spot patterns.
Pro Tip: Don’t neglect the uninjured leg. Clinicians consistently see reinjury linked to lingering strength asymmetry, and addressing bilateral strength and movement control is one of the most overlooked parts of adductor strain rehab. Train both sides, even if one feels “fine.”
What does a phased groin strain exercise programme look like?
A structured, criteria-based exercise programme is the backbone of effective groin strain recovery, and it needs to be sequenced correctly to work. Rushing from rest straight into sprinting drills is the single most common reason people re-tear the same muscle. Physiotherapy protocols typically use five phases, each with its own goals, exercises, and, most importantly, an exit test before moving on.
Phase 1: acute protection
The goal here is simply to protect the injured tissue while maintaining gentle movement. This usually lasts 3 to 7 days depending on grade.
Pain-free hip range of motion: gentle, slow movements through comfortable range, 2 to 3 sets of 10, several times daily.
Isometric adductor squeeze: light squeeze of a pillow or cushion between the knees, holding 5 to 10 seconds, well within pain-free limits.
Walking: short, flat, pain-free walks, gradually increasing duration.
Exit criteria: walking without a limp and pain-free gentle hip movement.
Phase 2: activation and isometrics
Once acute pain has settled, isometric loading builds strength without the shearing forces of dynamic movement, and it’s often surprisingly effective for reducing pain quickly.
Isometric adductor holds: seated or lying, pressing the knees together against light resistance (a hand, band, or ball), holding 10 to 15 seconds for 5 repetitions, several times daily.
Side-lying hip abduction: light activation of the outer hip to balance the adductor work, 2 sets of 12.
Bridge holds: engaging glutes and core, 3 sets of 10-second holds.
Exit criteria: pain-free isometric squeeze at moderate effort, and comfortable single-leg standing balance.
Phase 3: progressive concentric and eccentric strengthening
This is where the real strength-building happens, and where most people either succeed by respecting the exit criteria or set themselves back by rushing.
Standing adductor cable or band pulls: 3 sets of 10 to 12, focusing on controlled movement through full range.
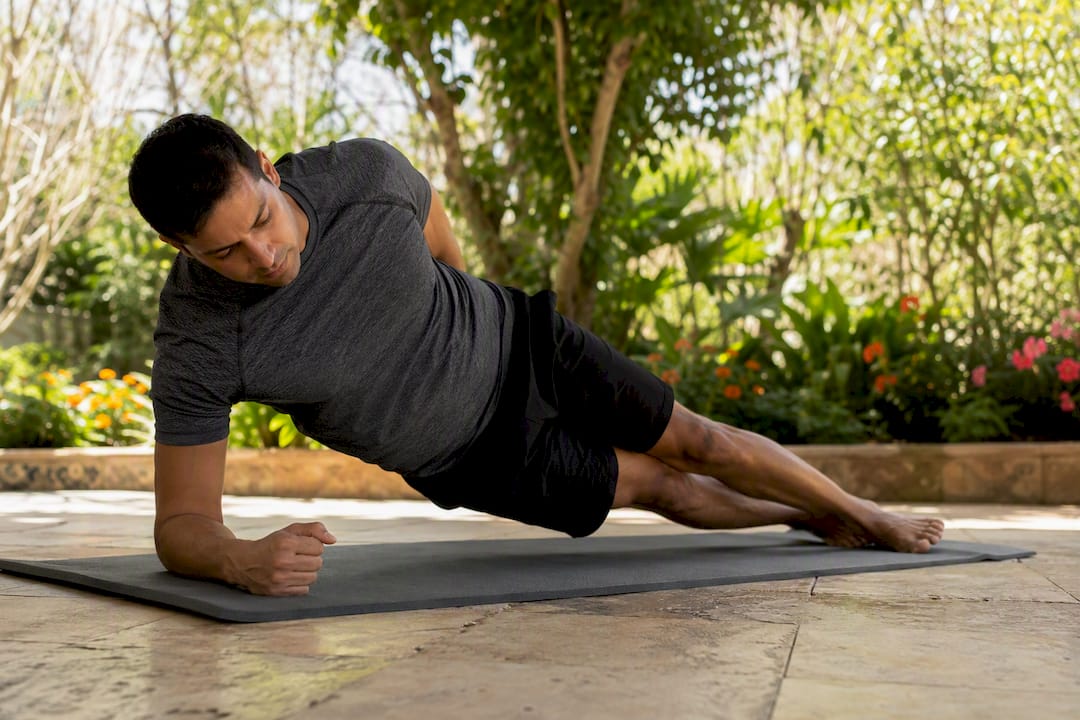
Copenhagen plank (short lever, progressing to long lever): start with knee-supported holds, building toward full-leg holds for 20 to 30 seconds, 3 sets.
Eccentric adductor slides: using a sliding disc or towel on a smooth floor, slowly sliding the leg out to the side and pulling it back, 3 sets of 8 to 10.
Lateral lunges: bodyweight initially, progressing to holding light weights, 3 sets of 8 per side.
Single-leg Romanian deadlifts: building hip and core control under load, 3 sets of 8.
Loading generally follows a tempo of 3 seconds down, 1 second pause, 2 seconds up on eccentric-focused exercises, since slower eccentric loading builds tendon and muscle resilience more effectively than rushed repetitions.
Phase 4: functional and sport preparation
Here you bridge strength gains into the actual movements your sport or daily life demands.
Progressive running programme: walk to jog to run, increasing pace and distance over sessions rather than jumping straight to sprinting.
Change-of-direction drills: starting with 45-degree cuts at moderate pace, building toward sharper angles and full speed.
Sport-specific movements: kicking drills, agility ladders, or cutting patterns relevant to your activity.
Proprioceptive work: single-leg balance on unstable surfaces, progressing to reactive balance challenges.
Phase 5: maintenance
Once you’ve returned to full training or sport, maintenance work prevents the strength gaps that lead to recurrence. This means continuing adductor and abductor strengthening, Copenhagen planks, and core stability work at a reduced but ongoing frequency, typically once or twice weekly.
Phase | Focus | Example exercise | Typical sets/reps |
1: Acute protection | Pain-free movement | Gentle hip range of motion | 2 to 3 sets of 10 |
2: Activation | Isometric loading | Isometric adductor squeeze | 5 reps of 10 to 15-second holds |
3: Strengthening | Concentric/eccentric loading | Copenhagen plank | 3 sets of 20 to 30-second holds |
4: Functional | Sport-specific movement | Change-of-direction drills | Progressive volume |
5: Maintenance | Ongoing resilience | Adductor and core work | 1 to 2 sessions weekly |
Rehab should follow local, regional, then global loading, meaning you load the injured tissue directly before layering on regional demands and then whole-body sport-specific patterns, according to research on load progression strategies. A short instructional video or annotated image set for each phase’s key exercises makes a genuine difference to technique, since cues like “slow the eccentric” are easy to describe and easy to get wrong without visual feedback. For a broader look at how physiotherapy structures this kind of programme, see this guide to physiotherapy’s role in groin recovery.
What tests show you’re ready to return to sport?
Deciding when to return to full training or competition should rest on objective testing, not how many weeks have passed since the injury. Relying on the calendar is exactly the mistake that drives the roughly 20% recurrence rate seen in athletes returning too early.
Three tests carry the most weight:
Squeeze test strength: pain-free maximal effort squeeze, ideally matching or approaching the uninjured side’s strength.
Isometric strength symmetry: adductor strength within 90% of the uninjured leg, measured manually or with a handheld dynamometer.
Single-leg hop and step tests: symmetrical hop distance and controlled landing mechanics without pain or compensation.
Combine these objective results with how you feel during full-intensity training. A pass on strength testing paired with lingering apprehension during cutting drills usually means you need another week of functional work, not a green light. Clinicians typically also check pain-free execution of sport-specific movements, sprinting at full speed, and multidirectional agility, before clearing return to competitive play. For sport-specific return protocols, this athlete’s guide to groin injuries covers testing in more depth.
When should you see a doctor about a groin strain?
Most groin strains respond well to structured rehab, but certain signs mean you should stop self-managing and get assessed promptly. These include a sudden, severe loss of strength that makes weight-bearing difficult, a large or rapidly expanding bruise, a palpable gap or defect in the muscle suggesting a full tear or avulsion, and any bulge or swelling in the groin that could indicate a hernia.
Sudden severe weakness or inability to bear weight on the affected leg.
Large haematoma developing within hours of injury.
A visible or palpable lump suggesting avulsion or hernia.
Groin pain accompanied by testicular pain, fever, or urinary symptoms.
If a groin injury produces a sudden pop, immediate severe weakness, and an inability to weight-bear, that combination points toward a possible tendon avulsion, and it needs imaging rather than a home stretching routine.
A clinician assessing these red flags will typically start with a clinical examination, then move to ultrasound or MRI if a tear, avulsion, or hernia is suspected. Don’t delay this kind of review; conservative treatment options are widely effective for straightforward strains, but a missed avulsion or hernia only gets harder to manage the longer it’s left.
How does a physiotherapy clinic assess and treat a groin strain?
A thorough clinical assessment starts with a detailed history and movement examination, checking pain location, aggravating factors, and strength through resisted testing. From there, objective measures like handheld dynamometer strength testing help establish a baseline and track progress against the uninjured side.
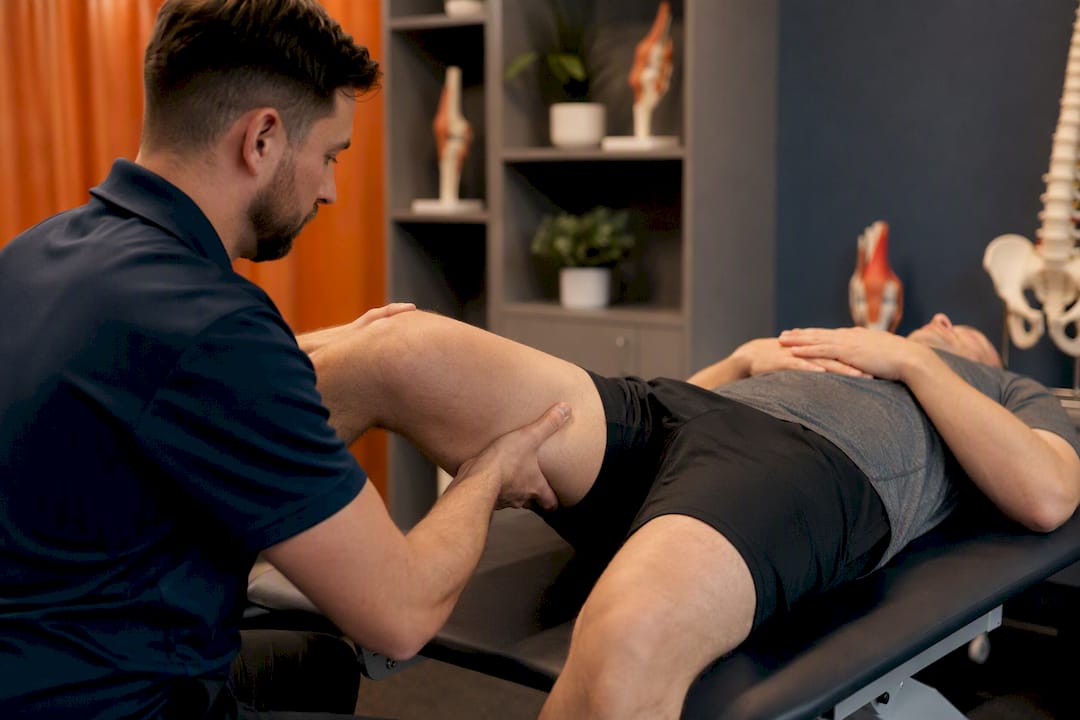
Imaging isn’t needed for every case. Clinicians generally reserve ultrasound or MRI for suspected higher-grade tears, cases not responding as expected, or when red flags point toward an alternative diagnosis. Where imaging isn’t warranted, an individualised exercise plan begins straight away, often paired with manual therapy to manage muscle guarding and support early movement confidence.
Parkstherapycentre has been delivering this kind of multidisciplinary musculoskeletal care since 1986, across clinic locations in Bedfordshire and Buckinghamshire, with a team spanning physiotherapy, sports injury treatment, and related disciplines. Insurance cover is accepted, and appointments can be arranged through online booking.
Pro Tip: Ask your physiotherapist for a written progression plan with specific exit criteria for each phase, not just a list of exercises. Knowing exactly what strength or pain-free test you need to pass before progressing removes the guesswork and the temptation to rush.
How do you prevent a groin strain from coming back?
Preventing recurrence means treating the strength imbalances that likely contributed to the original injury, not just resting until symptoms fade. A maintenance routine targeting adductor strength, hip abductors, glutes, and core control, done consistently, is one of the most effective tools available.
A simple 4 to 6 week maintenance microcycle might look like this:
Weeks 1 to 2: Copenhagen planks (short lever), side-lying hip abduction, and bridge holds, twice weekly.
Weeks 3 to 4: progress Copenhagen planks to long lever, add lateral lunges and single-leg Romanian deadlifts.
Weeks 5 to 6: integrate change-of-direction drills and sport-specific movement patterns, maintaining strength work at reduced volume.
Preseason strengthening programmes have shown meaningful reductions in adductor injury rates in some athlete cohorts, which reinforces why this isn’t a one-off box to tick after recovery. For structured warm-up and prevention drills to build into training, this guide to groin injury prevention offers practical routines worth adopting before the season starts.
A realistic note on setbacks and pacing
Most patients I see in this kind of recovery hit the same two pitfalls: returning to full training the moment pain disappears, and neglecting the uninjured leg because it “feels fine.” Neither reflects readiness. Pain-free doesn’t mean strength has been restored, and asymmetry left untreated is exactly what drives reinjury.
Progress by objective milestones, not by the calendar or how motivated you feel on a given day. A groin strain that takes an extra two weeks because you waited for a genuine strength symmetry result is a far better outcome than one that recurs because you didn’t.
Book a groin strain assessment with Parkstherapycentre
Getting a proper diagnosis early is what separates a two-week recovery from a two-month one, and that’s the gap a self-guided programme alone often can’t close. Parkstherapycentre gives you access to hands-on strength testing, an individualised exercise plan, and manual therapy support, rather than a generic exercise sheet applied to every patient regardless of grade or cause.
At your first appointment, expect a detailed history, movement and strength assessment, and a clear explanation of which structures are involved before any exercise plan is set. Parkstherapycentre has provided physiotherapy and sports injury treatment across Bedfordshire and Buckinghamshire since 1986, accepts a range of insurance providers, and offers online booking for a straightforward way to get started. If you’re dealing with groin pain that hasn’t resolved with home measures, or you simply want a faster, more structured path back to sport, book an assessment online to get a plan built around your specific injury.
Sources
Recommended