
Lower back pain exercises: quick routines that work
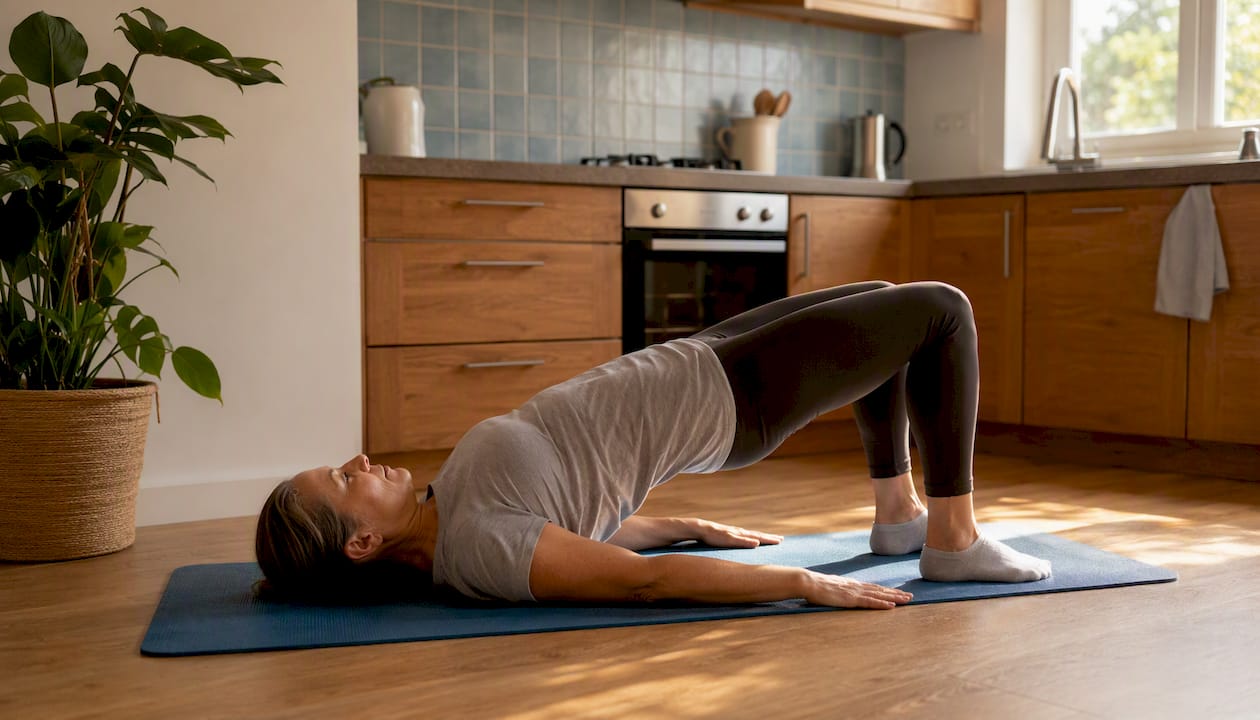
A short set of gentle mobilisation, stretching, and lumbar-stabilisation exercises, practised consistently, will usually reduce non-specific lower back pain and improve mobility within a few weeks. You do not need equipment, a gym membership, or hours to spare. The moves below are drawn from NHS and Cleveland Clinic guidance, and they are safe to begin at home today.
Start with these six moves:
Pelvic tilt (lying)
Single knee-to-chest stretch
Cat-camel (spinal flexion/extension)
Lying hamstring stretch
Glute bridge
Bird-dog
Stop immediately and seek urgent medical review if you notice: saddle anaesthesia (numbness in the groin or inner thighs), new bowel or bladder changes, rapidly progressive leg weakness, or fever following a fall or trauma. These are red flags that need same-day assessment, not home exercise.
Pro Tip: You should feel a gentle stretch or mild muscular effort, never a sharp or electric sensation. If a movement reproduces pain that travels down your leg, reduce the range or skip that exercise and speak to a physiotherapist.
Key takeaways
Combining gentle mobility work, lumbar stabilisation, and glute and hip strengthening, practised consistently over 4–8 weeks, is the most effective home approach to reducing non-specific lower back pain.
Point | Details |
Start gently and stay active | Complete rest increases stiffness; begin with the 5-minute daily routine and build from there. |
Combine three exercise types | Pair mobility stretches with lumbar stabilisation and glute strengthening for lasting benefit. |
Know your red flags | Saddle anaesthesia, bowel or bladder changes, and progressive leg weakness need urgent medical review. |
Progress gradually over weeks | Add reps before sets, sets before resistance; expect meaningful improvement within 2–8 weeks. |
Parkstherapycentre offers tailored support | A physiotherapy assessment provides a personalised plan, supervised Pilates, and multidisciplinary care. |
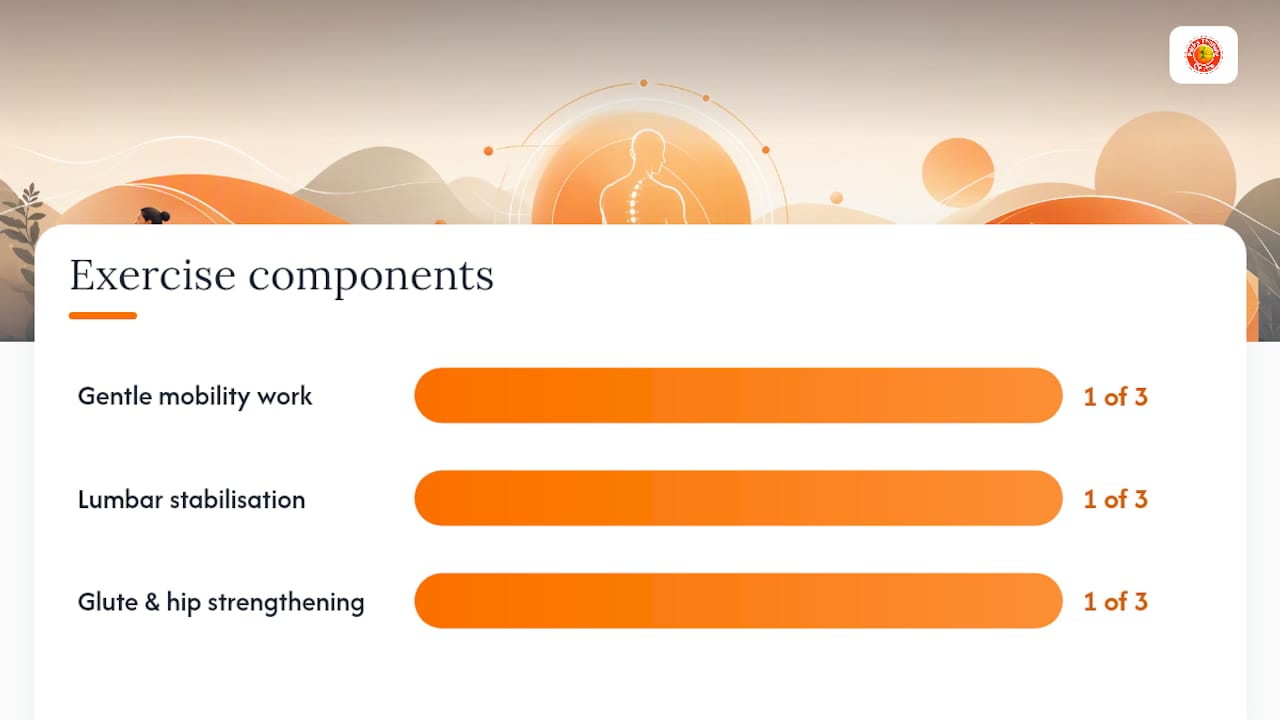
Table of Contents
Step-by-step lower back pain exercises with reps and modifications
Harvard Health recommends combining lumbar stabilisation with targeted stretching of the hamstrings, glutes, and hip flexors for better long-term outcomes than either approach alone. The ten exercises below follow that principle. Each entry includes a starting position, step-by-step cues, recommended reps, a modification for limited mobility, and a progression option.
1. Pelvic tilt
Goal: Activate deep abdominals and reduce lumbar compression.
Start: Lie on your back, knees bent, feet flat on the floor, arms by your sides.
Breathe in to prepare.
As you breathe out, gently flatten your lower back against the floor by tightening your abdominals.
Hold for 5 seconds, then release.
Reps/sets: 10 repetitions, 1–2 sets.
Modification: Perform seated in a firm chair if lying is uncomfortable.
Progression: Hold for 10 seconds; add a heel slide (straighten one leg slowly while maintaining the tilt).
Safety cue: No breath-holding. If your back arches away from the floor during the hold, reduce the effort.
2. Single knee-to-chest stretch
Goal: Decompress the lumbar spine and stretch the hip flexors.
Start: Lie on your back, both knees bent.
Bring one knee towards your chest, holding behind the thigh.
Keep the opposite foot flat on the floor.
Hold for 20–30 seconds, breathing steadily.
Lower and repeat on the other side.
Reps/sets: 3 holds each side.
Modification: Use a towel looped behind the thigh if reaching is difficult.
Progression: Gently add a small circular motion with the knee to increase hip mobility.
Safety cue: Do not pull the knee sharply. Stop if you feel pain in the hip joint rather than a stretch in the lower back.
3. Double knee hug with rotation
Goal: Mobilise the lumbar spine and release paraspinal tension.
Start: Lie on your back, both knees bent and drawn to your chest.
Slowly lower both knees to one side until you feel a gentle stretch.
Hold 5 seconds, return to centre.
Repeat to the other side.
Reps/sets: 8–10 repetitions each side.
Modification: Reduce the range so knees only drop partway if full rotation causes discomfort.
Progression: Pause at the end range for 10 seconds to deepen the stretch.
Safety cue: Keep your shoulders flat on the floor throughout.
4. Cat-camel
Goal: Restore spinal flexion and extension range of movement.
Start: On all fours, hands under shoulders, knees under hips, spine neutral.
Breathe out and round your back towards the ceiling (cat).
Hold 3 seconds.
Breathe in and let your back gently arch downward (camel).
Hold 3 seconds.
Reps/sets: 8–10 slow cycles.
Modification: Perform seated in a chair, rounding and arching the mid-back only.
Progression: Slow the tempo to 5 seconds each direction to increase control.
Safety cue: Move within a pain-free range. If the arch position causes sharp pain, stay in neutral and only perform the rounding phase.
Pro Tip: Think of the movement as a slow wave through the spine, not a sudden snap. Deep core engagement, not breath-holding, is what makes this effective.
5. Child’s pose (modified)
Goal: Stretch the lumbar extensors and thoracolumbar fascia.
Start: On all fours.
Sit your hips back towards your heels as far as comfortable.
Extend your arms forward along the floor.
Hold for 20–30 seconds, breathing slowly.
Reps/sets: 3 holds.
Modification: Place a folded blanket between your thighs and calves if your hips do not reach your heels.
Progression: Walk your hands slightly to one side to add a lateral stretch.
Safety cue: If knee discomfort prevents this position, return to the single knee-to-chest stretch instead.
6. Lying hamstring stretch (with strap)
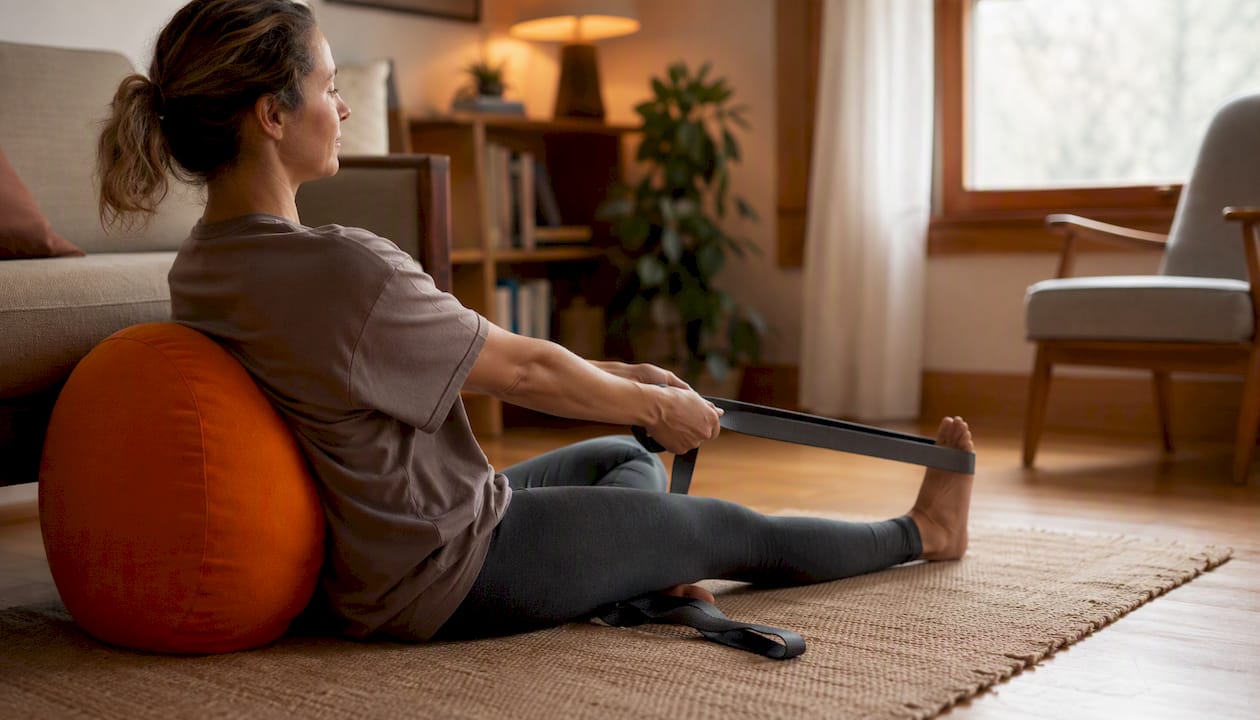
Goal: Reduce hamstring tightness, which contributes to lower back strain.
Start: Lie on your back, one knee bent, foot flat.
Loop a resistance band or towel around the sole of the other foot.
Straighten that leg towards the ceiling until you feel a stretch in the back of the thigh.
Hold 20–30 seconds.
Switch sides.
Reps/sets: 3 holds each side.
Modification: Keep a slight bend in the raised knee if the stretch is too intense.
Progression: Gently flex the foot (toes towards you) to increase neural and hamstring length.
Safety cue: Stop if you feel tingling or pain radiating into the foot. This may indicate nerve sensitivity; consult a physiotherapist.
7. Glute bridge
Goal: Strengthen the gluteus maximus and lumbar stabilisers.
Start: Lie on your back, knees bent, feet hip-width apart.
Breathe out and press through your heels to lift your hips until your body forms a straight line from knees to shoulders.
Squeeze your glutes at the top.
Hold 2 seconds, then lower slowly.
Reps/sets: 10–12 repetitions, 2 sets.
Modification: Reduce the height of the lift if you feel lower back pinching.
Progression: Extend one leg at the top (single-leg bridge) to increase load.
Safety cue: Avoid overarching the lower back at the top of the movement.
8. Bird-dog
Goal: Build lumbar stabilisation and anti-rotation control.
Start: On all fours, spine neutral.
Breathe out and simultaneously extend your right arm forward and left leg back.
Hold 5 seconds, keeping hips level.
Return to start and repeat on the opposite side.
Reps/sets: 8 repetitions each side, 2 sets.
Modification: Extend the leg only (no arm) until balance improves.
Progression: Add a 3-second pause at full extension, or hold a light ankle weight.
Safety cue: If your hips rotate or your back arches, reduce the range. Control matters more than reach.
9. Side-lying clamshell
Goal: Strengthen the gluteus medius to reduce hip-drop and lumbar load.
Start: Lie on your side, hips and knees bent to 45 degrees, feet together.
Keeping your feet together, rotate your top knee upward like a clamshell opening.
Hold 2 seconds at the top.
Lower slowly.
Reps/sets: 12–15 repetitions each side, 2 sets.
Modification: Reduce the range of rotation if you feel hip impingement.
Progression: Add a light resistance band just above the knees.
Safety cue: Keep your pelvis still throughout. Rolling the hips back to gain range defeats the purpose.
10. Standing lumbar rotation
Goal: Restore rotational mobility and reduce stiffness after prolonged sitting.
Start: Stand with feet shoulder-width apart, hands on hips.
Slowly rotate your upper body to the right, keeping hips facing forward.
Hold 3 seconds, return to centre.
Repeat to the left.
Reps/sets: 8–10 repetitions each direction.
Modification: Sit in a chair with feet flat if standing balance is a concern.
Progression: Extend your arms out to the sides to increase the rotational lever.
Safety cue: Move within a pain-free range. Do not force rotation past the point of comfort.
Three home routines you can start today
Mayo Clinic notes that short, repeatable daily sessions of stretching and strengthening are practical and effective. The three routines below are structured by available time. Begin with the 5-minute version and progress as your tolerance builds.
The 5-minute morning routine
Ideal when pain is acute or time is short. Perform this lying in bed or on a mat immediately after waking.
Pelvic tilt: 10 reps
Single knee-to-chest: 3 holds each side (20 seconds each)
Cat-camel: 8 slow cycles
Total time: approximately 5 minutes. Perform daily.
The 15-minute mid-day routine
A fuller session combining mobility and early stabilisation, aligned with the British Heart Foundation’s 15-minute lower back workout framework.
Pelvic tilt: 10 reps
Single knee-to-chest: 3 holds each side
Double knee hug with rotation: 8 reps each side
Cat-camel: 10 cycles
Child’s pose: 3 holds (30 seconds each)
Lying hamstring stretch: 3 holds each side
Total time: approximately 15 minutes. Aim for once daily or on alternate days if fatigued.
The 20-minute strengthening routine
Add this 2–3 times per week once the 15-minute routine feels manageable. It incorporates lumbar stabilisation and glute work for lasting benefit.
Pelvic tilt: 10 reps
Cat-camel: 10 cycles
Glute bridge: 12 reps, 2 sets
Bird-dog: 8 reps each side, 2 sets
Side-lying clamshell: 15 reps each side, 2 sets
Lying hamstring stretch: 3 holds each side
Standing lumbar rotation: 10 reps each direction
Total time: approximately 20 minutes.
Progression guidance: Spend at least one week on the 5-minute routine before adding the 15-minute session. Move to the 20-minute strengthening routine only when the 15-minute version causes no increase in pain the following day. Add reps before adding sets, and add sets before adding resistance or longer hold times.
Frequency note: Daily gentle mobility work (5–15 minutes) is appropriate for most people. Strengthening sessions benefit from a rest day between them to allow muscle adaptation. If your schedule only allows one session per day, split the mobility and strengthening components across morning and evening.
Pro Tip: For a practical daily spinal health checklist to complement these routines, the daily spinal health guide from Sparkmed offers straightforward habits that support recovery between sessions.
Safety guidance: when to stop and when to seek help
NHS Inform is clear that exercises may slightly increase symptoms at first, but discomfort should ease as your body adapts. The key is learning to distinguish normal muscle adaptation from warning signs.
Red flags requiring urgent GP or A&E review
Seek same-day medical attention if you experience any of the following:
Saddle anaesthesia: numbness or tingling in the groin, inner thighs, or perineum
New or worsening loss of bladder or bowel control
Rapidly progressive weakness in one or both legs
Severe back pain following a fall, accident, or trauma, particularly with fever
These symptoms may indicate a serious spinal condition such as cauda equina syndrome and must not be managed with home exercise alone.
Acceptable discomfort versus a reason to stop
Use a simple 0–10 pain scale as your guide. Pain at 3 or below during exercise is generally acceptable and often reflects muscle effort or mild stretching. Pain that rises above 5, or that reproduces sharp, shooting, or radiating sensations, is a signal to reduce range, slow the pace, or stop the movement entirely.
If pain increases noticeably the day after exercise, reduce the number of repetitions or the duration of holds in your next session rather than stopping altogether.
When to contact a clinician
See your GP or a physiotherapist if:
Symptoms have not improved after 2–6 weeks of consistent home exercise
Pain is worsening rather than plateauing or improving
You are unsure whether your symptoms are suitable for home exercise
You have a history of osteoporosis, recent spinal surgery, or inflammatory arthritis
For readers who have had recent back surgery, physiotherapy after back surgery provides specific guidance on supervised rehabilitation rather than generic home programmes.
How to progress safely over 4–8 weeks
StatPearls notes that established home programmes such as Williams flexion exercises and the McKenzie method have shown benefit for some patients over 8 weeks, with evidence supporting gradual, structured progression. The same principle applies to the routines in this guide.
Week-by-week progression framework
Weeks 1–2: Focus on the 5-minute morning routine daily. Prioritise consistency over intensity. Do not add exercises yet.
Weeks 3–4: Introduce the 15-minute routine on alternate days. Keep the 5-minute session on the remaining days.
Weeks 5–6: Add the 20-minute strengthening routine 2–3 times per week. Increase reps by 2 per exercise before adding a second set.
Weeks 7–8: Progress to 2 sets of each strengthening exercise. Begin adding light resistance (band or ankle weight) to the glute bridge and clamshell if pain-free.
Progression rules
Add repetitions before adding sets.
Add sets before adding resistance or longer hold times.
Add tolerance to a movement before increasing its range.
Never increase more than one variable at a time.
If a flare-up occurs, return to the previous week’s volume for 3–5 days before progressing again.
Common scenarios
Deconditioned beginners: Start with 5 reps per exercise rather than the full recommended count. Build to the stated reps over 2 weeks before progressing further.
People with flare-ups: During a flare, reduce to the 5-minute routine only. Focus on pelvic tilts and gentle knee-to-chest stretches. Resume the fuller programme when pain settles to a manageable level.
Returning after brief bed rest: Begin with 2–3 days of the 5-minute routine before reintroducing the 15-minute session. Bed rest of more than 1–2 days tends to increase stiffness and decondition the stabilising muscles quickly.
For a detailed step-by-step approach to rebuilding mobility after a setback, the guide on improving mobility after injury offers practical rehabilitation structure.
When to see a physiotherapist and what to expect
Home exercise is a strong starting point, but physiotherapy offers something a self-directed programme cannot: a clinical assessment that identifies the specific structures contributing to your pain and a tailored plan built around your findings.
What a physiotherapy assessment involves
A qualified physiotherapist will typically carry out a movement screening to assess range of motion, strength, and neural tension. They will ask about your history, aggravating factors, and goals, then design a home programme specific to your presentation. Manual therapy, such as joint mobilisation or soft tissue work, may be included where appropriate. The Sussex Community NHS rehabilitation framework reflects this graded, assessment-led approach.
Physiotherapist vs GP vs A&E
A&E: For red flag symptoms listed above. Do not delay.
GP: For persistent pain unresponsive to 6 weeks of exercise, suspected inflammatory cause, or referral for imaging.
Physiotherapist: For mechanical lower back pain, postural issues, rehabilitation after injury or surgery, and tailored exercise prescription.
Physiotherapists in the UK can be accessed via NHS referral (through your GP) or directly through private clinics without a referral. Private access typically means shorter waiting times and more appointment flexibility.
Evidence-based treatments physiotherapists use alongside exercise
Patient education and pain science explanation
Manual therapy (joint mobilisation, soft tissue techniques)
Progressive lumbar stabilisation and core strengthening
Pilates-style supervised classes for ongoing management
Graded activity and return-to-work or sport planning
Supervised Pilates for lower back problems is one of the most well-supported adjuncts to physiotherapy for mechanical back pain, particularly for building deep core control over time.
A physiotherapist’s perspective on getting started
Most people who come in with lower back pain have been managing it alone for longer than they needed to. The exercises in this guide are genuinely effective for non-specific mechanical pain, and the evidence behind them is solid. What I see consistently, though, is that people either push too hard too soon and flare up, or they stay so cautious that they never build the strength their spine needs. The sweet spot is deliberate, progressive movement within a pain-free range, repeated consistently over weeks, not days.
Realistic expectations matter. Many patients notice a meaningful reduction in stiffness and daily pain within 2–4 weeks of consistent exercise. Full improvement in strength and function typically takes 6–8 weeks or longer, particularly if pain has been present for months. That is not a reason to wait before starting. It is a reason to start now, gently, and build from there.
If you are unsure whether your symptoms are suitable for home exercise, or if you have tried these moves and are not seeing progress, a physiotherapy assessment will give you clarity and a plan that fits your specific situation.
Physiotherapy at Parkstherapycentre: book your assessment
Parkstherapycentre has been delivering physiotherapy and rehabilitation care across Bedfordshire and Buckinghamshire since 1986. If the home routines in this guide are not giving you the progress you need, or if you want a tailored programme from the start, an assessment with one of our qualified physiotherapists is the clearest next step.
What an assessment with us includes:
Movement screening and clinical diagnosis
A personalised exercise plan, including home and clinic-based work
Supervised Pilates classes for lumbar stabilisation and core control
Manual therapy where clinically indicated
Acceptance of most major health insurance providers
Multidisciplinary access to sports injury, podiatry, and acupuncture where needed
Appointments are available across multiple clinic locations, with online booking for convenience. Book your physiotherapy assessment today and get a programme built around your specific needs, not a generic routine.
Sources
Consult your GP or a qualified physiotherapist for personalised advice, particularly if your symptoms are severe, persistent, or accompanied by any of the red flags listed in this guide.
This article is general information, not a substitute for advice from a qualified doctor. Consult a qualified healthcare professional about your own circumstances before acting on anything here.
Recommended