
Fix ankle instability in 6–8 weeks: four phase exercises for adults

Progressive strength training combined with balance and proprioception drills reduces recurrent ankle sprains and restores functional stability more reliably than rest alone. A structured programme moves through mobility, strength, balance, then sport-specific work. Most people notice meaningful improvement within 6 to 8 weeks, with fuller neuromuscular recovery by 12 to 16 weeks. Persistent giving-way, severe pain, or numbness warrants a physiotherapy assessment before continuing.
TL;DR:
Structured rehab involving mobility, strength, and balance exercises reduces recurrent ankle sprains more effectively than rest alone within 6 to 8 weeks.
Proprioception training, such as single-leg stance and star reach drills, is critical and often underestimated in preventing future instability.
Exercise progression should be gradual, with only one variable changed at a time to avoid re-injury, and soreness tracking is vital for safe advancement.
Self-management is appropriate for most cases unless there is severe pain, deformity, numbness, or persistent instability after several weeks, warranting a physiotherapy assessment.
Combining balance training with strength and hip control work offers the best long-term protection against ankle re-injury, with evidence showing around half of athletes benefit from balance protocols.
Table of Contents
The four-phase ankle instability exercises programme
Ankle instability rarely improves with a single exercise repeated endlessly. It responds to a sequence: restore movement, rebuild strength, retrain balance, then reintroduce sport or work demands. Each phase has its own goal, and jumping ahead before you’re ready is one of the most common reasons rehab stalls.
Phase 1: Range of motion and gentle loading (roughly week 1 to 2)
The goal here is simply to get the joint moving without irritating it further. Three exercises do most of the work:
Ankle alphabet. Sitting with your leg extended, trace the letters of the alphabet in the air with your big toe. This restores movement in every direction without any load.
Ankle pumps. Point and flex the foot slowly, 15 to 20 repetitions, several times a day.
Gentle calf stretching. Lean against a wall with the affected leg back, heel down, holding 20 to 30 seconds.
Progress by feel, not by the calendar. If an exercise causes sharp pain rather than mild stretch discomfort, back off and try again the next day.
Phase 2: Strength (roughly week 2 to 5)
Once pain-free movement is established, load the muscles that actually stabilise the joint: the peroneals (evertors) and tibialis anterior.
Resistance-band eversion and inversion: 3 sets of 12 to 15 reps, 3 to 4 times weekly.
Tibialis anterior dorsiflexion against band resistance: same volume.
Calf raises (double-leg progressing to single-leg): 3 sets of 12 to 15 reps daily or every other day.
This phase is where a lot of home-based recoveries plateau, largely because band work feels unglamorous compared to balance drills. Skipping it, though, leaves the ankle without the raw strength that proprioception training is meant to refine.
Phase 3: Proprioception and balance (roughly week 4 to 8)
This is the phase most people underestimate, and the evidence is unambiguous about its value. Balance-based rehabilitation protocols using single-limb stance progressions and star-excursion reach patterns consistently improve postural control in people with chronic ankle instability. Start with single-leg stance on a firm floor for 30 seconds, then progress to a wobble board, then to the same stance with eyes closed. Add star excursion drills, where you balance on one leg and reach the other foot out in eight directions without losing form.
Phase 4: Return to activity (week 8 onward)
Introduce lateral shuffles, controlled hopping, and sport-specific drills such as cutting or jumping. This is also where a brace or ankle taping earns its place, not as a substitute for the work already done, but as extra support during the highest-risk activities. A guide to preventing ankle ligament injuries covers this transition in more detail.

How fast should you progress through the exercises?
Progression isn’t about ticking off exercises. It’s about making each one systematically harder once the current version feels easy, not painful.
You have four dials to turn: increase resistance (a stronger band, added weight), reduce external support (two feet to one foot, holding a rail to no rail), add instability (firm floor to foam pad to wobble board), and increase speed or close your eyes to remove visual compensation. Change one dial at a time. Changing two or three at once is how people re-injure themselves during rehab, mistaking ambition for progress.
Sample 6 to 8 week beginner plan:
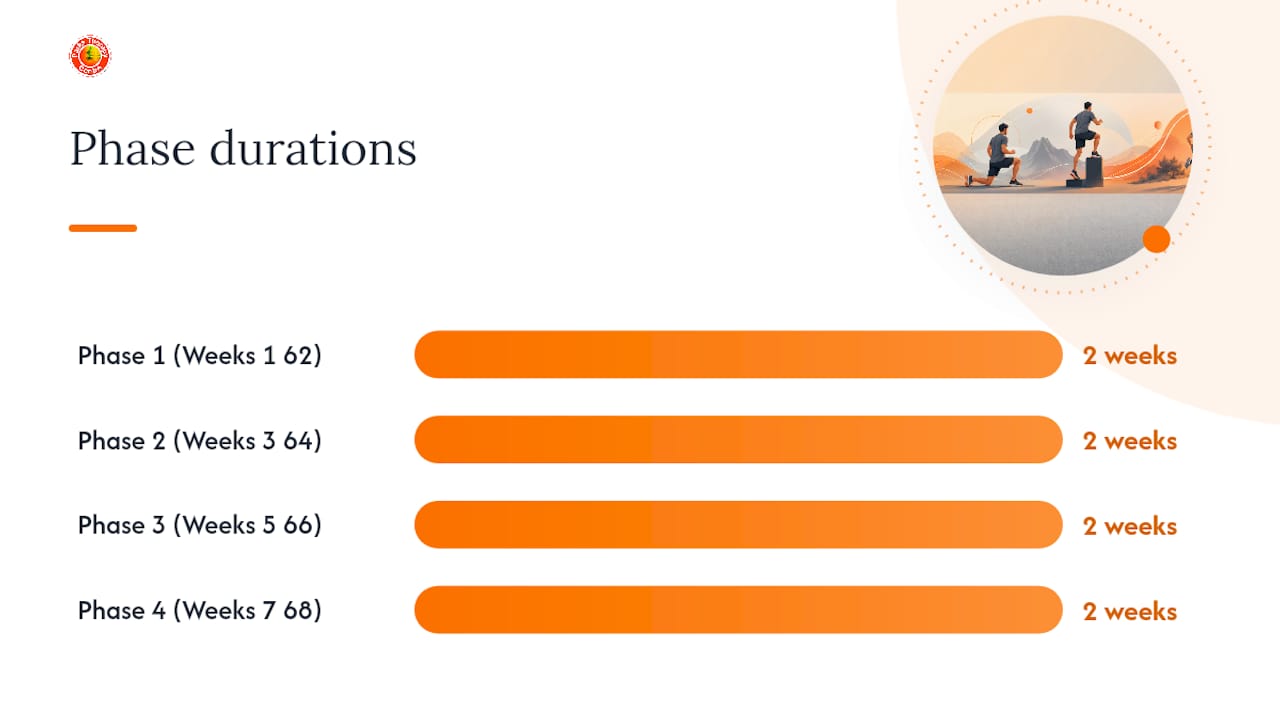
Weeks 1 to 2: Phase 1 daily, introduce resistance-band work at low resistance every other day.
Weeks 3 to 4: Full Phase 2 strength work, begin single-leg stance for 30 seconds, 3 sets.
Weeks 5 to 6: Progress single-leg stance to foam surface, add calf raise progression to single-leg.
Weeks 7 to 8: Introduce wobble board and light star excursion reaches.
Sample 8 to 12 week return-to-sport extension builds on this by adding lateral hopping in week 9, controlled plyometrics in week 10, and sport-specific cutting or direction-change drills from week 11, always alongside continued strength work rather than instead of it.
A useful load-management rule: if soreness from a session lasts beyond 24 hours or feels sharp rather than achy, repeat the previous week’s level before progressing again. Ordinary muscle fatigue settles within a day; a genuine setback lingers and often changes how you walk. Three sessions a week is generally enough to see phase-by-phase gains without overloading a joint that’s still healing. A dated exercise log, even a simple one, makes this pattern easy to spot; A rehabilitation checklist is built for exactly this kind of tracking.
How do you perform these exercises correctly?
Technique matters more than intensity for most of these movements. Get the mechanics right and the strength gains follow; get them wrong and you reinforce the very compensation patterns causing the instability in the first place.
Resistance-band eversion/inversion: Anchor the band to a table leg, loop it around your forefoot, and move only at the ankle. Keep the knee still. A common fault is rotating the whole leg from the hip instead of isolating the ankle joint.
Single-leg stance progressions: Stand tall, soft knee, eyes forward. Common fault: leaning the torso or gripping with the toes to cheat balance. Fix it by lightly touching a wall with one finger, then removing that support once stable.
Calf raise variations: Rise slowly through the big toe, pause at the top, lower with control over 2 to 3 seconds. Rushing the lowering phase wastes most of the strength benefit.
Hop-to-stabilisation: Hop sideways onto the affected leg and hold the landing for 3 seconds without wobbling. Watch for knee valgus (the knee caving inward) on landing, a strong sign the hip and glute aren’t controlling the leg properly.
Star excursion reaches: Reach as far as possible in each of eight directions while keeping the standing leg stable. Reaching further than control allows defeats the purpose.
Lateral hop: Small, controlled hops side to side, landing softly. Avoid stiff-legged landings, which transfer force straight into the ankle instead of absorbing it through the hip and knee.
Single-leg Romanian deadlift: Hinge at the hip with a soft standing knee, keeping the back flat. This builds the hip control that stabilises the ankle from above, not just at the joint itself.
Ankle alphabet: Move slowly and deliberately; rushing turns it into a wasted warm-up rather than a genuine mobility drill.
Pro Tip: If you find yourself staring hard at your foot to stay balanced during single-leg work, that’s a sign you’re relying on vision to compensate for weak proprioception. Try the same exercise with your eyes closed for five seconds at a time once the basic version feels stable.
When should you see a physiotherapist instead of self-managing?
Most ankle instability responds well to a structured home programme, but certain signs mean self-management isn’t appropriate.
Severe pain, visible deformity, or inability to bear any weight, which can indicate a fracture rather than a ligament issue.
Numbness, tingling, or a cold, pale foot, suggesting possible nerve or circulation involvement.
Repeated giving-way despite several weeks of correct, consistent rehab.
Swelling or bruising that worsens rather than settles after the first few days.
Ordinary post-exercise soreness fades within a day and improves with gentle movement; a mechanical instability problem tends to persist or worsen with the same activity. A physiotherapist assessment adds value beyond a generic programme. It identifies which specific structures are lax or weak, checks for hip and core compensation patterns you can’t easily see yourself, and can incorporate manual therapy, orthotics, or a referral for imaging if something doesn’t fit the typical picture. The causes of ankle injuries often shape which direction that assessment takes.
Does the evidence actually support this approach?
The numbers here are worth taking seriously. A systematic review and meta-analysis found that athletes wearing an ankle brace reduced sprain risk by around 64%, while those completing structured balance training reduced risk by around 46%, both compared with untreated controls.
Neither figure means bracing is superior to exercise. Bracing offers an immediate mechanical restraint; balance training rebuilds the neuromuscular control that prevents the ankle rolling in the first place, and that adaptation tends to hold up once the brace comes off. The British Journal of Sports Medicine’s clinical guideline on ankle sprain management recommends exercise therapy after lateral ankle injury specifically to reduce recurrence, and notes that lace-up or semirigid braces outperform simple elastic bandages for functional support. In practice, that means treating bracing as an adjunct for high-risk sport or early-stage rehab, not a substitute for the strength and balance work that actually changes how the ankle behaves under load.
What do clinicians actually see go wrong?
The most common mistake in clinic isn’t laziness, it’s sequencing. Patients often skip proprioception work entirely because it looks too simple to matter, or they train the ankle in isolation while ignoring the hip and core control that governs how load reaches the joint. Harvard Health points to weak hip and glute control as a frequent, overlooked contributor to repeat sprains.
What works instead: short daily sessions of 5 to 10 minutes, paired with a simple written log, beat sporadic long sessions almost every time. Attaching the routine to an existing habit, brushing teeth, making coffee, makes it far easier to sustain past week three.
What actually matters most in ankle rehab?
The conventional advice on ankle instability leans heavily on strength exercises: bands, calf raises, resistance work. That’s necessary but incomplete, and it’s the incompleteness that causes most repeat sprains. Strength without proprioception rebuilds the muscle but not the reaction time; a strong ankle that still reacts slowly to an uneven surface will roll just as easily as a weak one.
If I had to rank priorities for someone starting from scratch, proprioception work would sit above strength training, not below it, particularly past the first two weeks. Most home programmes treat balance drills as an afterthought tacked onto the end of a session. The research on balance and strength protocols suggests it deserves equal billing from early on.
The other gap is hip control. Ankles rarely fail in isolation. A weak glute changes how force travels down the leg long before the ankle ever takes the blame. Fix the ankle without fixing the hip above it, and you’ve treated the symptom rather than the mechanism.
— Ivan
A home programme takes you a long way, but it can’t tell you whether your instability is muscular, ligamentous, or a combination that needs a different approach entirely. A physiotherapy assessment can identify exactly which structures are underperforming and build a progression tailored to that finding rather than a generic timeline. That matters most in the first few weeks, when getting the sequencing wrong costs you time later.
A range of health insurance covers alongside private appointments are accepted, and bookings can be made online without waiting for a referral. Supporting connective tissue nutrition, such as the collagen intake research covered by our nutrition partners, can complement this work but doesn’t replace hands-on assessment. If your ankle keeps giving way despite following a structured plan, book a physiotherapy assessment and get a rehabilitation programme built around your specific findings.
Sources
Recommended