
Step by step ankle sprain rehabilitation guide
- 1 day ago
- 8 min read
TL;DR:
Effective ankle sprain rehabilitation involves a structured, phase-based approach guided by clinical criteria, not just time or pain levels. Early mobility exercises and targeted strengthening prevent chronic instability and reduce the risk of re-sprains, with full functional testing necessary before returning to activity. Following evidence-based protocols and completing comprehensive proprioception training is essential for safe recovery and injury prevention.
Ankle sprain rehabilitation is a phased clinical process designed to restore mobility, strength, and neuromotor control safely and prevent reinjury. Whether you have rolled your ankle on a football pitch or missed a kerb, the recovery process follows the same structured logic: control pain first, restore movement second, rebuild strength third, and retrain balance before returning to full activity. Clinicians refer to this as criteria-based progression, meaning you advance each phase based on measurable markers, not simply how many days have passed. This guide walks you through every stage of the ankle sprain recovery process, with exercises, timelines, and clinical tests drawn from current evidence.
What are the phases of step by step ankle sprain rehabilitation?
Ankle sprain rehabilitation is structured in four progressive phases: Acute, Subacute, Reconditioning, and Return to Play. Each phase has specific goals and measurable criteria you must meet before moving forward. Skipping a phase or rushing the timeline is the single most common reason people re-sprain the same ankle within months.
The table below outlines each phase, its primary goals, and the criteria required to progress.
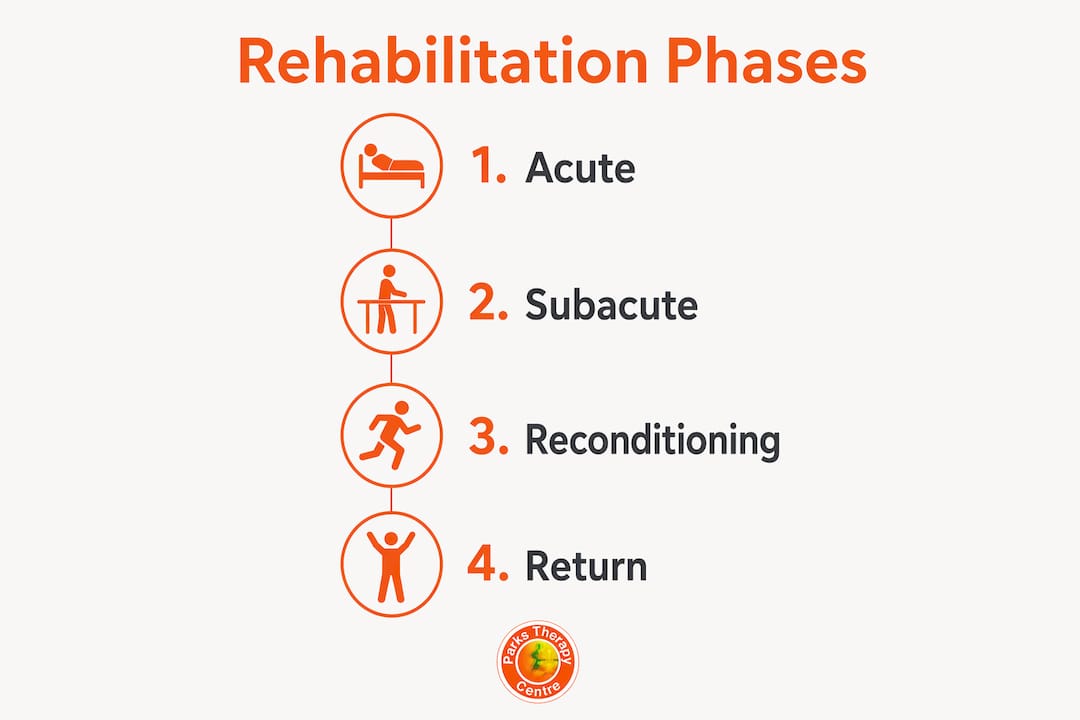
Phase | Primary goal | Progression criteria |
Acute (days 1-5) | Control pain and swelling | Pain below 3/10, swelling reducing |
Subacute (week 1-3) | Restore range of motion | Full pain-free passive movement |
Reconditioning (week 2-8) | Rebuild strength and balance | Limb Symmetry Index deficit below 20% |
Return to play (week 4-12+) | Sport or activity readiness | 90% limb symmetry, pain-free function |
Recovery timelines vary considerably by severity. Grade 1 sprains resolve in 1 to 3 weeks, Grade 2 sprains typically take 3 to 6 weeks with proper rehabilitation, and Grade 3 sprains involving complete ligament rupture require 6 to 12 weeks or longer. These are averages, not guarantees. If your symptoms persist beyond expected timelines, reassessment by a physiotherapist is warranted.
Key goals across the full programme include:
Reducing acute inflammation without suppressing healing
Restoring full dorsiflexion range, which is the most critical movement to regain to avoid compensatory injury patterns
Rebuilding peroneal (eversion) muscle strength to protect against lateral re-sprains
Retraining proprioception and neuromuscular control
Passing functional performance tests before returning to sport or strenuous work
Even mild Grade 1 sprains benefit from phase-based progression with measurable criteria. Treating a minor sprain as trivial and skipping structured rehab is a reliable path to chronic ankle instability.
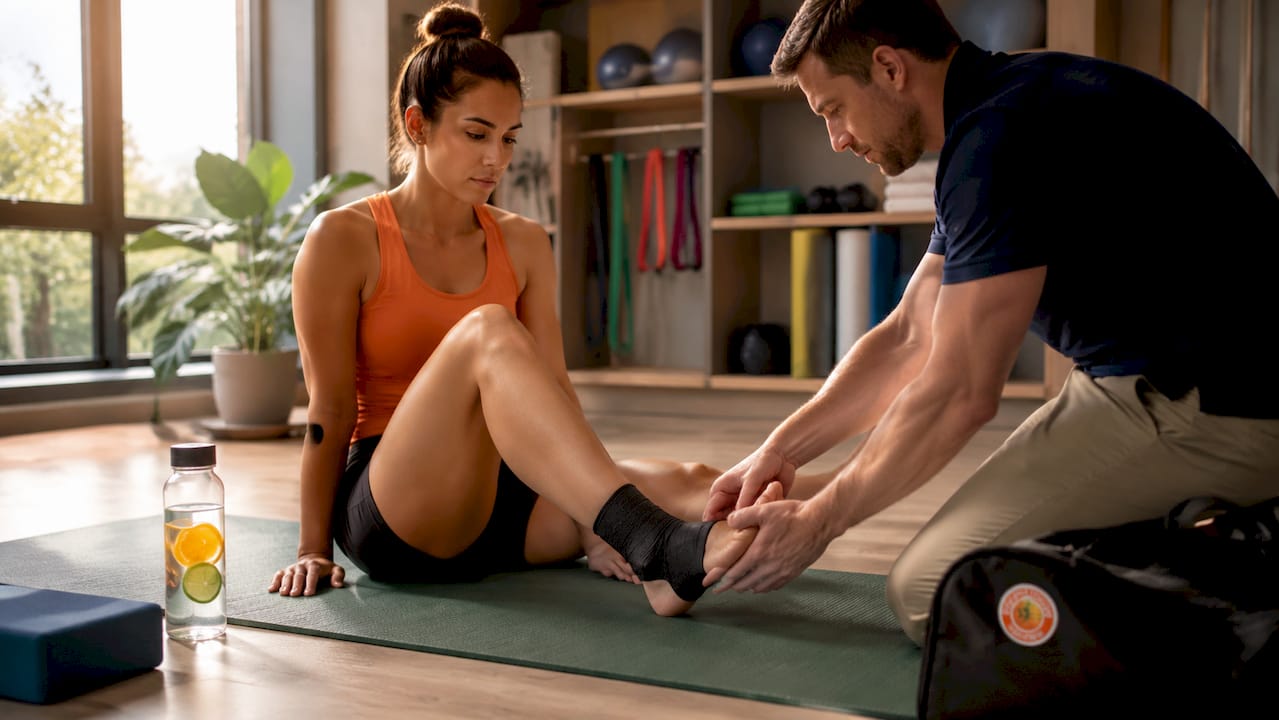
How to safely start early ankle mobility and pain management
The first priority after an ankle sprain is protecting the joint while keeping it moving within a pain-free range. Prolonged immobilisation causes stiffness and delays recovery. The PEACE protocol (Protection, Elevation, Avoid anti-inflammatories, Compression, Education) has largely replaced the older RICE model in clinical practice, reflecting the understanding that some inflammation is part of healthy tissue repair.

In the first 24 to 72 hours, use crutches if weight-bearing is painful, apply compression bandaging, and elevate the ankle above heart level when resting. A lace-up brace or stirrup brace provides stability without fully immobilising the joint. Avoid heat, alcohol, and massage in the acute phase as all three increase swelling.
Safe early mobility exercises to begin in the first few days include:
Ankle alphabet: Seated with your foot off the floor, trace each letter of the alphabet using your foot. This moves the ankle through its full range without load.
Ankle circles: Slow, controlled circles clockwise and anticlockwise, 10 repetitions each direction.
Ankle pumps: Flex and point the foot repeatedly. This activates the calf pump and reduces swelling.
Seated exercises enable movement without full bodyweight load, making them ideal for early activation. You can find a detailed breakdown of low-load activation drills in this early mobility guide from Parkstherapycentre.
Pro Tip: Do not push through sharp or worsening pain during early exercises. A mild ache of 2 to 3 out of 10 is acceptable. Anything above that signals you are loading too much too soon.
Before starting any rehabilitation programme, apply the Ottawa Ankle Rules to rule out fracture. If you have tenderness directly over the malleolus bones or cannot bear weight for four steps, seek an X-ray before beginning rehab. Applying these rules reduces unnecessary imaging by 30 to 40% while catching serious injuries that mimic simple sprains.
What are the recommended strengthening and proprioception exercises?
Once pain is below 3/10 at rest and you can walk without a significant limp, you are ready to begin structured strengthening. This typically falls between days 5 and 14 for Grade 1 and 2 sprains. The goal is to rebuild the muscles that support the ankle, particularly the peroneals, tibialis anterior, and calf complex, before reintroducing dynamic loading.
A structured strengthening progression looks like this:
Resistance band plantarflexion and dorsiflexion: Sit with your leg extended. Loop a resistance band around the foot and push down (plantarflexion) and pull up (dorsiflexion) against the band. Perform 3 sets of 15 repetitions.
Resistance band inversion and eversion: With the band anchored, turn the foot inward and outward against resistance. Four-way band exercises targeting all planes of ankle motion are recommended in 15-minute sessions, progressing resistance cautiously.
Double-leg calf raises: Progress to standing calf raises once weight-bearing is comfortable. Aim for 3 sets of 20 before advancing to single-leg.
Single-leg calf raises: The gold standard for calf and Achilles loading. Start with a wall for balance support.
Single-leg balance (eyes open): Stand on the injured leg for 30 to 60 seconds. This is the entry point for proprioception retraining.
Single-leg balance (eyes closed): Removing visual input forces the ankle’s position-sense receptors to work harder. Stable single-limb stance with eyes closed is a key milestone before progressing to unstable surfaces.
Wobble board or rocker board training: Introduces dynamic perturbations that replicate real-world balance demands.
Pro Tip: Peroneal (eversion) control is the most neglected element of ankle rehab. If you skip eversion band work and single-leg balance, you leave the lateral ankle unprotected when you return to sport.
The table below maps exercises to approximate recovery weeks for a Grade 2 sprain.
Week | Exercise focus | Milestone to progress |
1 to 2 | Band exercises, seated mobility | Pain below 3/10, full passive range |
2 to 4 | Calf raises, single-leg stance | Limb symmetry deficit below 20% |
4 to 6 | Wobble board, dynamic balance | Confident single-leg balance, eyes closed |
6 to 8+ | Plyometrics, sport-specific drills | Functional test scores at 90%+ symmetry |
Ligament injuries impair position-sense receptors, which is why neuromotor retraining is not optional. It is the mechanism that prevents chronic ankle instability, a condition affecting a significant proportion of people who do not complete full rehabilitation. For guidance on building a structured post-injury training plan, Parkstherapycentre has a practical post-injury training resource worth reviewing.
How do you know when you are ready to return to full activity?
Return to sport or strenuous activity is not a decision based on how the ankle feels on a good day. It is based on passing a set of functional performance tests that measure whether your injured ankle performs symmetrically with the uninjured side.
The key criteria for return to full activity are:
Pain-free full range of motion in all planes, including dorsiflexion under load
Limb Symmetry Index of 90% or above across strength and balance measures. Functional tests require approximately 90% symmetry before return to competition is considered safe.
Hop tests: Single-leg hop for distance, triple hop, and crossover hop. These assess power, coordination, and confidence under dynamic load.
Y-Balance anterior reach: Measures dynamic balance and hip-ankle coordination. Deficits here predict reinjury risk.
Step-down test: Assesses single-leg control under eccentric load, which replicates landing mechanics.
Beyond physical tests, confidence matters. Fear of movement (kinesiophobia) slows recovery and increases reinjury risk. Patient confidence directly impacts recovery rates, and addressing fear of loading is as clinically relevant as the physical exercises themselves. If you feel hesitant about returning to sport, that hesitation is data worth discussing with your physiotherapist.
For athletes returning after a Grade 2 or 3 sprain, a lace-up ankle brace or prophylactic taping during the first 4 to 6 weeks of return to sport reduces reinjury risk. Gradual activity progression, starting with straight-line running before cutting and jumping, is the safest path back. Parkstherapycentre’s guide on assessing sports injuries covers early triage and clinical screening criteria in detail.
Key takeaways
Ankle sprain rehabilitation succeeds when progression is driven by measurable clinical criteria, not elapsed time or subjective pain alone.
Point | Details |
Phase-based progression | Move through Acute, Subacute, Reconditioning, and Return to Play phases in sequence. |
Criteria over time | Advance phases when pain is below 3/10 and Limb Symmetry Index deficit is below 20%. |
Early mobility is safe | Seated ankle alphabet, circles, and pumps begin within the first few days. |
Proprioception is non-negotiable | Single-leg balance and wobble board training prevent chronic ankle instability. |
Return to activity requires testing | Pass hop tests and Y-Balance at 90% symmetry before resuming sport or heavy work. |
Why I think most people underestimate ankle rehab
After working with patients recovering from ankle sprains across a wide range of activity levels, the pattern I see most often is this: people stop rehabilitation the moment they stop limping. That is not recovery. That is the end of the Acute phase.
The two things that most reliably predict a re-sprain are incomplete dorsiflexion recovery and skipped proprioception work. Dorsiflexion loss is subtle. You may not notice it in daily walking, but it shows up as a compensatory knee valgus during a squat or a shortened stride on stairs. Objective measures like the Limb Symmetry Index are far more reliable than time elapsed for deciding when to progress, and most people never use them because they are not aware they exist.
The other thing I would push back on is the assumption that a Grade 1 sprain does not need structured rehab. It does. The ligament may be intact, but the proprioceptive nerve endings within it are disrupted. Early loading and structured phase progression prevent stiffness and instability far better than rest alone. If you have sprained the same ankle more than once, incomplete neuromotor retraining is almost certainly the reason. Seek a physiotherapist who uses functional tests to guide your discharge, not just a pain score.
— Ivan
How Parkstherapycentre can support your recovery
Parkstherapycentre has been delivering physiotherapy and sports injury rehabilitation since 1986, across multiple clinics in Bedfordshire and Buckinghamshire. If you are working through an ankle sprain and want a structured, evidence-based plan tailored to your specific grade of injury and activity goals, their team of qualified physiotherapists can assess you, design a phase-based programme, and use objective clinical tests to track your progress at every stage. Whether you are a recreational runner, a weekend footballer, or simply want to get back to walking without pain, professional supervision makes a measurable difference to outcomes. Book an assessment directly through the Parkstherapycentre website and get a rehabilitation plan built around your recovery, not a generic timeline.
FAQ
How long does ankle sprain rehabilitation take?
Recovery depends on severity. Grade 1 sprains typically resolve in 1 to 3 weeks, Grade 2 in 3 to 6 weeks, and Grade 3 sprains in 6 to 12 weeks or longer with structured rehabilitation.
When can I start exercising after an ankle sprain?
Gentle seated mobility exercises such as ankle pumps and ankle alphabet movements can begin within the first 1 to 3 days, provided pain remains below 3/10 and no fracture has been ruled out using the Ottawa Ankle Rules.
What exercises are most important for ankle sprain recovery?
Four-way resistance band strengthening, single-leg calf raises, and progressive single-leg balance training are the three most clinically significant exercise categories for restoring strength and preventing reinjury.
How do I know if I need an X-ray after an ankle sprain?
Apply the Ottawa Ankle Rules: if you have tenderness directly over the malleolus or cannot take four weight-bearing steps, seek imaging before beginning rehabilitation to rule out a fracture.
Can I prevent future ankle sprains after rehabilitation?
Completing the full proprioception and balance retraining phase, including wobble board work and single-leg balance with eyes closed, significantly reduces reinjury risk by restoring the neuromotor control that ligament damage disrupts.
Recommended