
Step by step hand pain therapy guide: recover fully
- a few seconds ago
- 9 min read

TL;DR:
Structured hand therapy is essential for reducing pain, restoring grip strength, and returning to daily activities after injury or chronic conditions. Following a step-by-step plan through assessment, pain relief, mobility, and strengthening leads to better outcomes and avoids re-injury.
Structured hand therapy, known clinically as hand rehabilitation, is the most effective pathway to reduce pain, restore grip strength, and return to daily activities after a hand injury or chronic condition. This step by step hand pain therapy guide covers every phase of recovery, from initial assessment and swelling control through to progressive strengthening. Most musculoskeletal hand conditions improve within 6–8 weeks of consistent self-management. That timeline is realistic, but only when you follow a structured plan rather than guessing your way through it.
What does a step by step hand pain therapy guide involve?
A hand rehabilitation plan moves through four distinct phases: assessment and preparation, early pain relief, mobility restoration, and functional strengthening. Each phase builds on the last. Skipping ahead, particularly to strengthening before motion has returned, is the single most common reason people plateau or re-injure themselves.
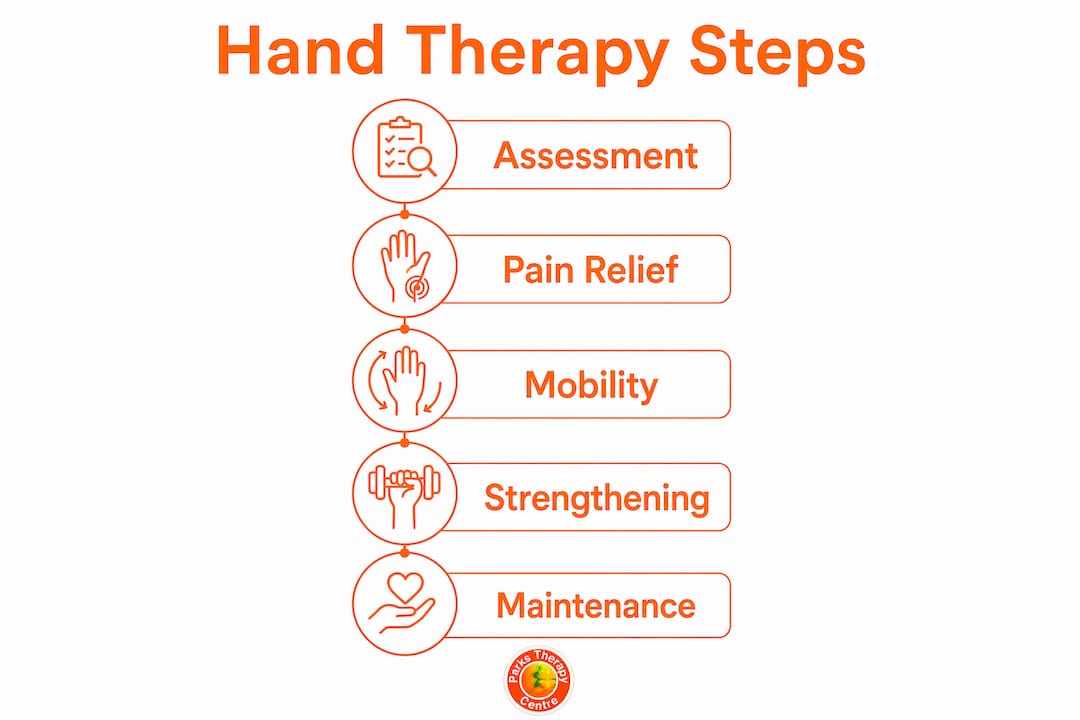
Functional evaluation of how you actually use your hand in daily life matters more than isolated clinical tests alone. A thorough assessment tells you which movements aggravate your pain, which structures are involved, and where to start. Without that baseline, you are exercising blind.
What do you need before starting hand therapy at home?
Preparation determines whether your self-management is safe or counterproductive. Gather the right tools before you begin.
Basic equipment checklist:
Ice pack or bag of frozen peas wrapped in a thin towel
Compression bandage or tubular support
Exercise putty or a soft stress ball
Rubber bands for resistance exercises
Wrist or finger splint if recommended by a clinician
A notebook or phone app to keep a pain log
Pro Tip: Keep your pain log specific. Record which exact movement caused discomfort, the time of day, and a pain score out of ten. Detailed pain logs improve diagnostic accuracy far more than imaging alone, because they reveal patterns that scans cannot.
Certain situations require professional assessment before you attempt any home therapy. Seek clinical advice if your pain is severe, if you have noticed worsening numbness or tingling, if the hand looks deformed, or if symptoms appeared after a significant injury. These are not situations for a DIY approach.
Situation | Recommended action |
Pain present for less than one week | Begin gentle self-management with monitoring |
No improvement after one week | Book a professional assessment |
Worsening numbness or tingling | Seek clinical review promptly |
Visible deformity or sudden loss of motion | Attend urgent care or A&E |
Suspected fracture or dislocation | Do not self-manage; seek immediate assessment |
How to manage pain and swelling in the early stage
The early phase of hand rehabilitation focuses on three goals: controlling inflammation, maintaining gentle movement, and protecting the injured area from further stress.
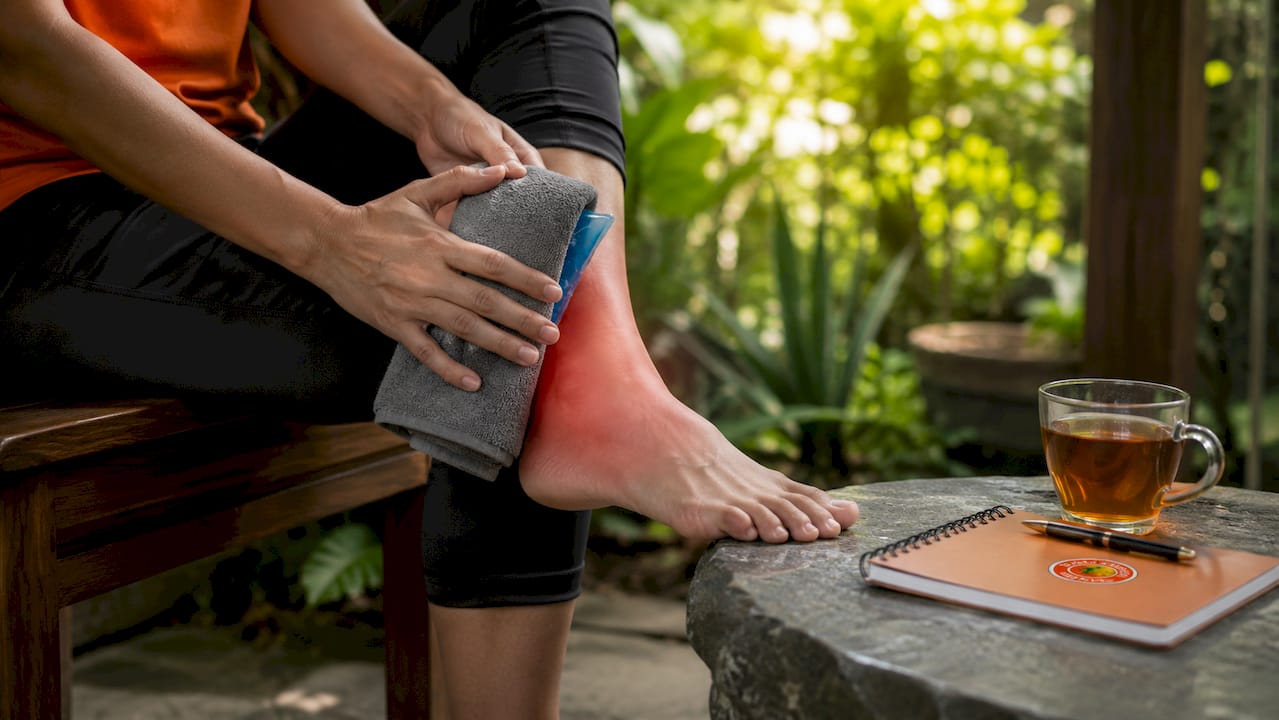
1. Apply relative rest, not complete immobilisation.Relative rest means reducing aggravating loads while keeping the hand gently active. Full immobilisation causes stiffness and adhesions within days. Modify your daily tasks rather than stopping all hand use entirely.
2. Use ice correctly. Apply an ice pack wrapped in a towel for a maximum of 20 minutes per session. Repeat every few hours as needed. Never apply ice directly to skin, as tissue damage can occur quickly.
3. Elevate the hand. Keep your hand raised above heart level when resting, particularly in the first 48–72 hours. Elevation reduces fluid pooling and limits swelling.
4. Apply gentle compression. A tubular bandage or compression glove reduces swelling without restricting circulation. Check that your fingertips remain pink and warm.
5. Begin gentle range of motion exercises. Slowly open and close your fingers within a pain-free range. Do not force movement. Aim for 10 repetitions, three times daily. These early movements prevent the joint capsule from tightening.
6. Use a splint if advised. Wear a splint with no creases in the lining to avoid pressure sores. Remove it periodically for gentle movement unless a clinician has instructed otherwise.
Pro Tip: Soft tissue massage around the hand and forearm, not directly over the painful area, improves local circulation and reduces muscle guarding. Use your opposite thumb to apply slow, firm strokes along the forearm muscles for two to three minutes.
Step-by-step exercises to restore mobility and reduce stiffness
Early movement should be gentle and guided to prevent stiffness without risking tissue overload. The exercises below follow a standard tendon-gliding and mobilisation sequence used in clinical hand therapy.
Tendon-gliding sequence (perform in this order):
Start with your fingers straight and together.
Bend your fingers at the middle and tip joints only, keeping the knuckles straight. Hold for three seconds.
Make a full fist, curling all fingers into the palm. Hold for three seconds.
Return to the straight position. Repeat 10 times.
Finger bending and straightening:
Place your hand flat on a table, palm down.
Lift each finger individually, holding for two seconds before lowering.
Work through all four fingers and the thumb. Repeat the sequence three times.
Thumb opposition:
Touch the tip of your thumb to the tip of each finger in turn.
Move from the index finger to the little finger and back.
Perform 10 full sequences, twice daily.
Wrist circles:
Rest your forearm on a table with your hand hanging over the edge.
Slowly rotate your wrist in a full circle, five times clockwise and five times anticlockwise.
Stop if you feel sharp pain.
The pain-free rule applies to every exercise. Sharp pain or increased swelling means you are pushing too hard. Reduce the range of motion or the number of repetitions immediately.
Monitor your hand after each session. Mild aching that settles within 30 minutes is acceptable. Swelling that persists for more than an hour after exercise is a signal to reduce intensity. You can find additional mobility restoration techniques that complement this sequence well.
When and how to introduce strengthening exercises
Strengthening begins only after motion has improved and resting pain has reduced significantly. Rushing into resistance work before that point overloads healing tissue and sets recovery back. For conditions such as carpal tunnel syndrome, a 6-week conservative trial of splinting and therapeutic exercises is the standard recommendation before any invasive treatment is considered.
Common strengthening tools and exercises:
Exercise putty: Squeeze, pinch, and roll putty to build grip and pinch strength gradually. Start with the softest grade available.
Rubber bands: Loop a band around your fingers and open them against resistance. This targets the extensor muscles, which grip trainers often neglect.
Grip trainers: Use a spring-loaded grip device for 10–15 repetitions per set, two to three sets daily.
Task-specific retraining: Practise functional tasks such as turning a key, opening a jar, or picking up small objects. These activities rebuild the coordination that pure strength exercises cannot replicate.
One factor that most guides overlook is the role of the shoulder and upper back. Addressing upper limb biomechanics improves long-term outcomes in hand therapy. Poor shoulder blade stability and restricted thoracic mobility alter the load distribution through the entire arm. A step by step arm rehabilitation plan that includes shoulder blade exercises alongside hand work produces better results than hand exercises alone. The shoulder pain treatment guide from Parkstherapycentre explains how upstream mechanics affect distal hand function.
Pro Tip: After each strengthening session, check whether your hand looks more swollen than before you started. Graded resistance exercises should produce mild fatigue, not visible puffiness. If swelling appears, reduce resistance and increase rest between sets.
How do you recognise warning signs during hand therapy?
Most people progress steadily through a hand rehabilitation plan. Some, however, encounter warning signs that require a change of approach or professional input.
Red flags that need clinical assessment:
Worsening numbness or pins and needles in the fingers
Sudden loss of grip strength or range of motion
Visible muscle wasting at the base of the thumb (thenar wasting)
Severe swelling that does not reduce with elevation and ice
Pain that is constant, worsening at night, or unrelated to movement
Thenar wasting and sensory loss indicate serious nerve compression. These signs cannot be managed with home exercises alone and require urgent professional evaluation.
Common mistakes to avoid:
Over-exercising through sharp pain in the belief that “no pain, no gain” applies
Wearing a splint continuously without removing it for gentle movement
Stopping therapy too early because pain has reduced, before strength has returned
Ignoring swelling responses after exercise sessions
“Persistent or unusual symptoms during hand therapy are not a sign of failure. They are information. A pain log that captures exactly when and how symptoms change gives a clinician far more to work with than a vague report of ‘it hurts.’ Adjusting the plan based on that data is how recovery stays on track.”
Maintaining a consistent pain log throughout your rehabilitation is one of the most practical things you can do. It tells you whether you are progressing, plateauing, or regressing, and it gives any clinician you consult a clear picture of your trajectory. For a broader view of pain management strategies that complement hand therapy, Parkstherapycentre has a detailed resource worth reading alongside this guide.
Key takeaways
Effective hand rehabilitation requires structured progression through assessment, pain relief, mobility work, and strengthening, with the pain-free rule applied at every stage.
Point | Details |
Expect 6–8 weeks for improvement | Most hand conditions respond to consistent self-management within this window. |
Relative rest beats full immobilisation | Gentle movement prevents stiffness and adhesions from forming in healing tissue. |
Ice safely, maximum 20 minutes | Always use a towel barrier and repeat every few hours, never apply ice directly to skin. |
Address the whole upper limb | Shoulder and thoracic mechanics directly affect hand recovery outcomes. |
Recognise red flags early | Thenar wasting, sensory loss, or worsening numbness require urgent clinical review. |
What I have learned from years of watching hand therapy work and fail
The patients who recover fastest are rarely the ones who work hardest. They are the ones who are most consistent and most honest with themselves about what their hand is telling them.
The biggest mistake I see is treating the pain-free rule as optional. People feel a sharp twinge during an exercise and push through it, assuming the discomfort is just part of the process. It is not. Sharp pain during hand exercises is the tissue telling you the load is too high for the current healing stage. Ignoring it does not build resilience. It builds scar tissue in the wrong places.
The second thing I would tell anyone starting a hand rehabilitation programme is to look further up the arm than they think they need to. Therapy focusing solely on the hand often fails to deliver lasting results. The shoulder blade, the thoracic spine, and the forearm muscles all contribute to how load is distributed through the wrist and fingers. A step by step arm rehabilitation plan that accounts for these upstream factors consistently outperforms one that treats the hand in isolation.
Patience is not passive. Sticking to a structured plan when your symptoms fluctuate, keeping your pain log even on good days, and resisting the urge to skip ahead to strengthening before motion has returned. These are active choices that determine whether you recover fully or manage a chronic problem indefinitely. The hand pain prevention tips from Parkstherapycentre are worth reading once you reach the strengthening phase, because protecting a recovered hand is just as important as rehabilitating an injured one.
— Ivan
Hand rehabilitation support from Parkstherapycentre
Self-management gets many people a long way. Professional assessment takes them the rest of the way.

Parkstherapycentre has provided physiotherapy and musculoskeletal rehabilitation across Bedfordshire and Buckinghamshire since 1986. The team includes qualified hand and upper limb therapists who build personalised treatment plans based on your specific condition, healing stage, and daily demands. If your symptoms have not improved after one week of self-management, or if you have encountered any of the red flags described in this guide, a clinical assessment will give you a clear diagnosis and a plan tailored to your situation. Book an appointment through the Parkstherapycentre website and get the professional input your recovery deserves.
FAQ
How long does hand pain therapy take to work?
Most hand conditions improve within 6–8 weeks of consistent self-management. Seek professional assessment if there is no progress after one week or if symptoms worsen.
Is it safe to exercise a painful hand at home?
Yes, provided you follow the pain-free rule. Exercises should remain pain-free; sharp pain or increased swelling after a session means the intensity is too high and should be reduced immediately.
What is the difference between rest and relative rest in hand therapy?
Relative rest means reducing activities that aggravate your hand while keeping it gently mobile. Full immobilisation causes stiffness and adhesions within days, which slows recovery rather than supporting it.
When should I start strengthening exercises for my hand?
Begin strengthening only after resting pain has reduced and range of motion has improved. For conditions such as carpal tunnel syndrome, a six-week trial of splinting and gentle exercises is standard before progressing to resistance work.
What are the red flags that mean I should stop self-managing?
Worsening numbness, thenar muscle wasting, sudden loss of grip, or severe swelling that does not settle with elevation all require urgent clinical review and cannot be managed safely at home.
Recommended